A Starter account user cannot generate a build. To find out how to upgrade a Starter account, check out our FAQ article, How do I upgrade my Starter account to a paid account? (Credit Card Payments, Purchase Orders, Checks/ACH)
You must have a saved Authority Document list to generate a build. To find out how to create an Authority Document list, check out our FAQ article How do I create an Authority Document list?
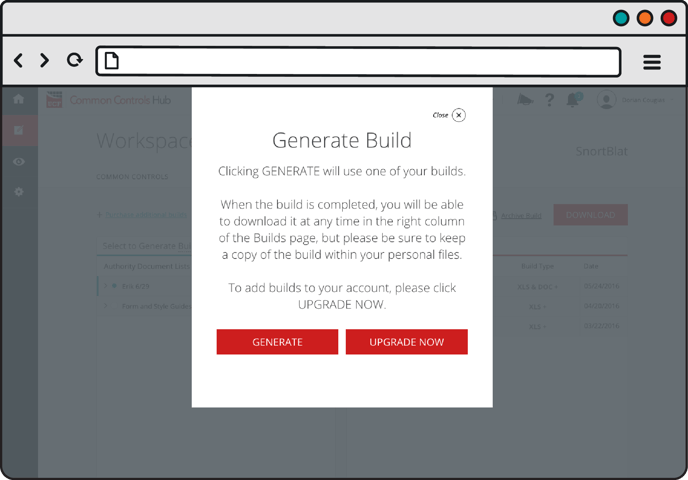
Note: Once you generate a build, you cannot go back and modify it. After you or your team has used all five of your build generations for the year, you must purchase additional builds to generate more.
You can download a build as many times as you want and share that build with anyone in your organization, including people who do not have CCH accounts.
To generate a build:
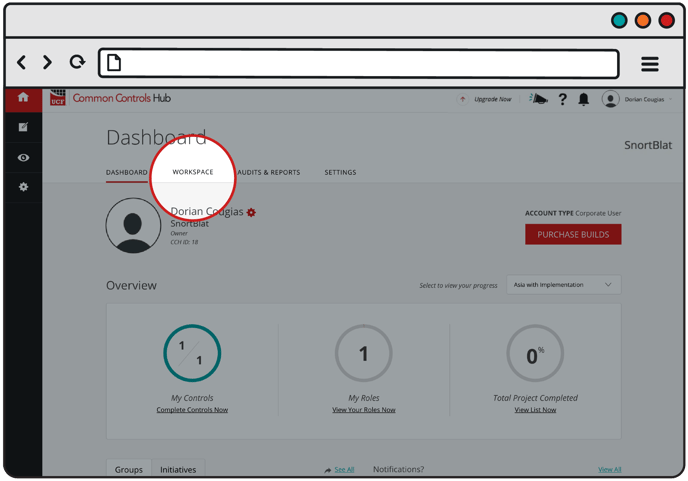
- From your Dashboard, click the Workspace tab.

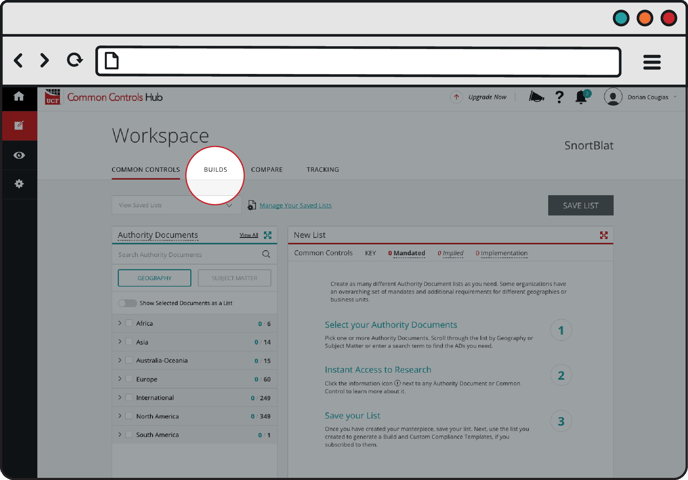
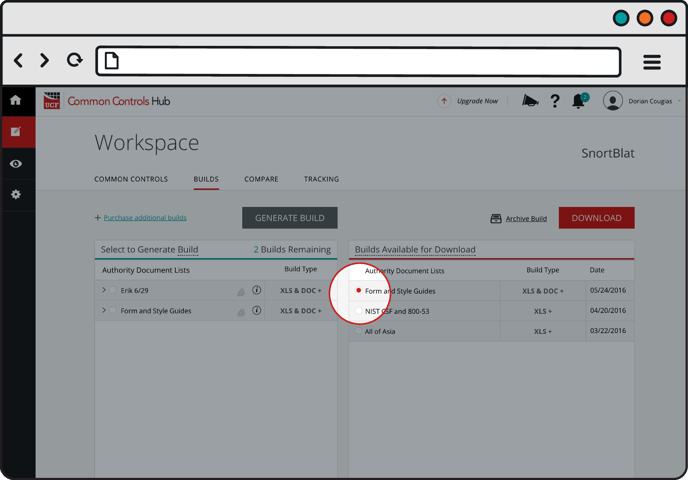
- Click the Builds tab.

- Select the Authority Document list you want to generate a build from, and click the Generate Build button.

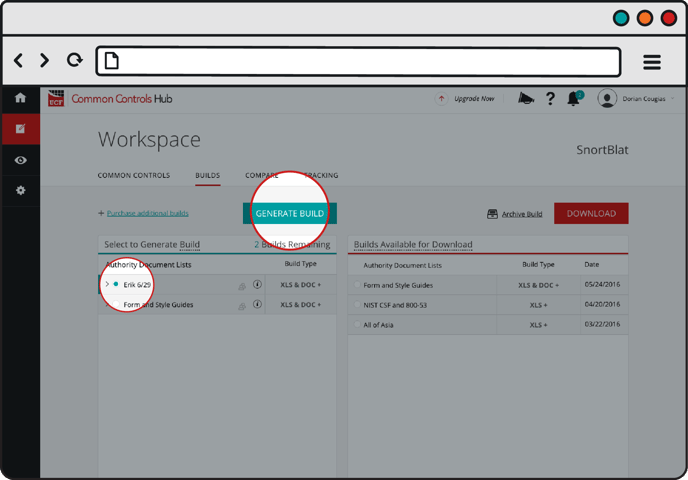
- Click the Generate button.

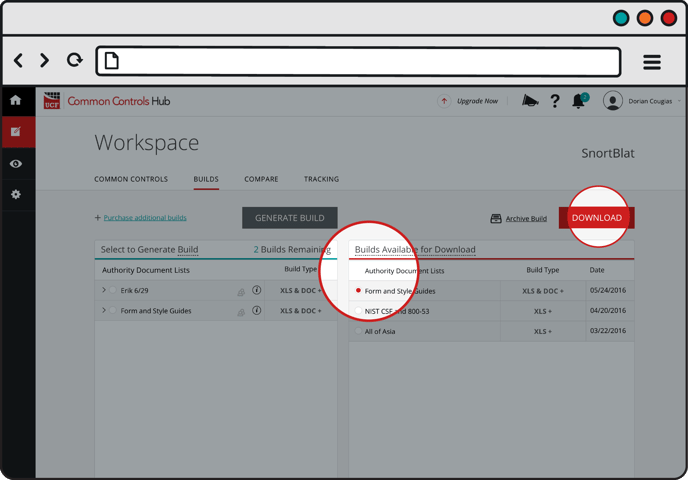
- Your build will appear in the Builds Available for Download list. The build will take time to generate. While it is generating, a red spinner will appear next to the name of the Authority Document list you used for your build.

- Once the build has finished generating, the spinner will be replaced with a radio button. Select the radio button and click the Download button to save the build to your computer.

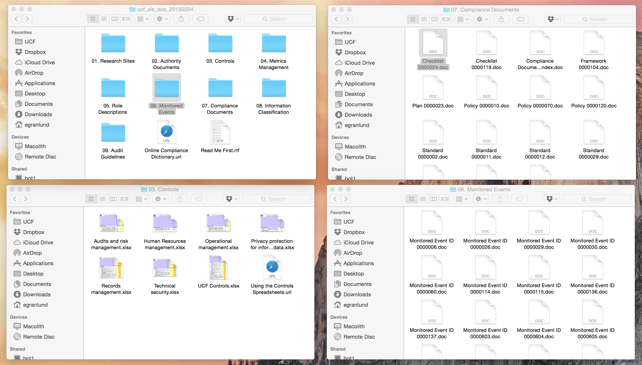
Your build has the same folder structure as a UCF release.